Posts

Android QR Code Scanner using third party Library

Image
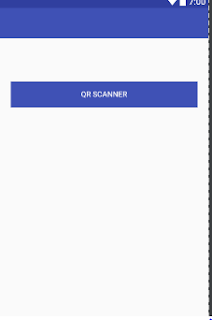
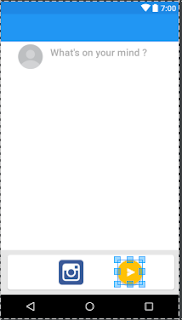
Objective : In this tutorial we will learn how to use QR code scanning using third party library ZXingScanner in Android Application. We will follow the steps ass below. Step-1:                Basic introduction of the QR code scanner. -QR stands for Quick Response code which is a two dimensional barcode (matrix codes) that allows contents to be decoded at a high speed. QR code system is invented in 1994 by japanese company Denso-Wave. -Quick Response code is a licence free and QR have the square dots which are arranged in a grid with white color background which are easily read by the scanner or camera which are called the imaging devices. -QR code have the different different sizes which are starts from the 21X21 pixels which is version 1,25X25 pixels is version 2 and go on up to 177X177 which is version 40. -QR codes storing the addresses and URLS may appear in newspapers,books,business cards..etc or any type of entity which user want the information. -QR

Upload Image From Android Application To server

Image
Uploading image from android application to the server is little bit tough or we can say complex task with comare to the web application because in web application we can directly use the file uploading controls to upload the image from application to the server but in andorid we can upload same as web application but it's not good thing to do that way so we have to convert that image into Base64 string and then upload on the server and server side we have to decode that string into image code using base64 decode So let's start we have upload image from android to php server step-1) Create Xml file for desinging source code <LinearLayout xmlns:android="http://schemas.android.com/apk/res/android"     xmlns:app="http://schemas.android.com/apk/res-auto"     android:layout_width="match_parent"     android:layout_height="match_parent"     android:background="@android:color/white"     android:orientation="vertica

Setup Kotlin for Android Studio

This is believing you already have Android Studio (version 2.2 +), and its Android SDK (version 24+) and Java SDK (at least 7+) installed in you system. Step - 1) Setup the Kotlin Plugin in Android Studio.         To use the Kotlin in Android Studio we have to first add plugin in to the Android Studio Android Studio ? Select Preference ? Select Plugins ? Browse Repository ? type “Kotlin” in search box ? and just install it This is only one thing you have to do once for Android Studio and you can use it. Step - 2) Add Kotlin classpath to project Build.Gradle         For gradle we have support of the Kotlin  so we have to add two classpath that display below. buildscript {     ext.kotlin_version = "1.1.1"     ext.supportLibVersion = "25.3.0"     repositories {         jcenter()     }     dependencies {         classpath 'com.android.tools.build:gradle:2.3.0'         classpath "org.jetbrains.kotlin:kotlin-gradle-plugin:$kotlin_versi

Kotlin Introduction

Basic Introduction of Kotlin Apple released the Swift programming language for iOS, and for developing the ios application there is already swift available so many Android developers have wanted a similar language for Android development. so i know many developers and you are going to love Kotlin, a JVM language that is remarkably similar to Swift. Kotlin is a like java but not exactly same, there is some syntax difference and all and the basic features of Kotlin is like.. Kotlin is a statically-typed language, and it's developed by JetBrains Company, whose syntax is more expressive and concise than that of Java. With features like higher-order functions, lambda expressions, operator overloading, string templates, and more, Kotlin has a lot more to offer than Java. Because Java and Kotlin are highly interoperable, they can be used together in the same project. If you are a competent programmer in Java, you will be able to learn Kotlin in a very short time. In this tut